
Well, this is new to many, and for most it is like an alien technology, but this is the future and it is absolutely necessary for the internet, oh, I could say urgently!
So what do you need to do to get a better night’s sleep, knowing that your traffic is not “spied on” by unauthorized people or by other entities?
First of all, you should know that if you are a big fan of Microsoft, Apple or Google, you will get over it! … until now, Google Chrome, Safari or Edge (ex IE) have not shown their intention to invest resources for this.
Just as there have been many attempts to ban/block/restrict DNSSEC, so are the implementation of Encrypted SNI or other methods of traffic encryption, which until 2015 was largely unencrypted, meaning it was almost entirely available to the curious to spy on what information “flows” through the optical fiber and and through servers.
However, everything changed between 2015-2016, when Let’s Encrypt began to offer free security certificates, which had never been heard before, reaching that in February 2020 Let’s Encrypt exceeded 1 billion certificates issued!
At first it was SSL, then DNSSEC and now the last “find” is Encrypted SNI … and to have them all “available” in a browser, then you have only one alternative, Mozilla Firefox … for now, but certainly not the latest invention in terms of security and the right to privacy!
But not to prolong it, here are the necessary settings for Mozilla Firefox to make online browsing an experience as safe and private as possible:
1). Enabling Secure DNS – DNSSEC
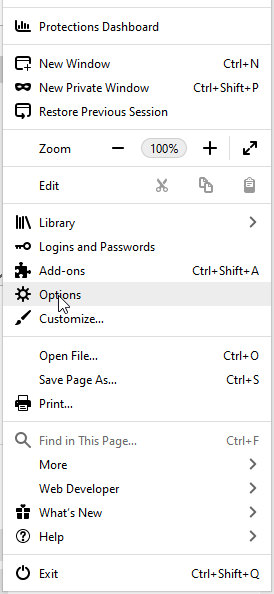
Choose from the [Options] browser menu
Search in the open window, after the [Network Settings] section and click on [Settings]
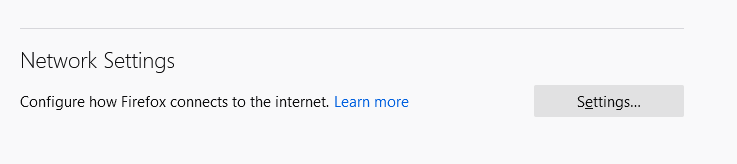
In the newly opened window you will find the searched option at the bottom: [x] Enable DNS over HTTPS

Check the option and from the next list [Use Provider] choose the preferred DNSSEC provider, I personally opted for Cloudflare, but you can choose NextDNS or possibly a custom DNS Secure!

Click on [OK] and that’s about all you had to do to activate Secure DNS – DNSSEC.
2). Enabling Encrypted SNI
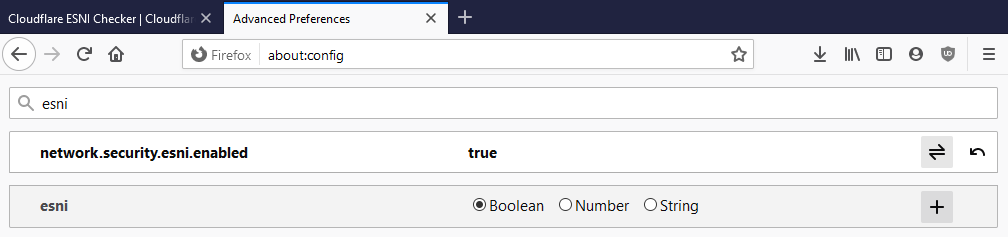
This option is not yet normally visible in the usual configuration because it is a technology in development (beta), but you can access it from the URL field of the browser by typing the following:
about:config
You will be greeted by the following message: Proceed with Caution Changing advanced configuration preferences can impact Firefox performance or security.

Go further by clicking on the button: [Accept the Risk and Continue] and in the next screen you just have to look for what interests you. Type esni in search box and change the option network.security.esni.enabled from false to true and close the window .:
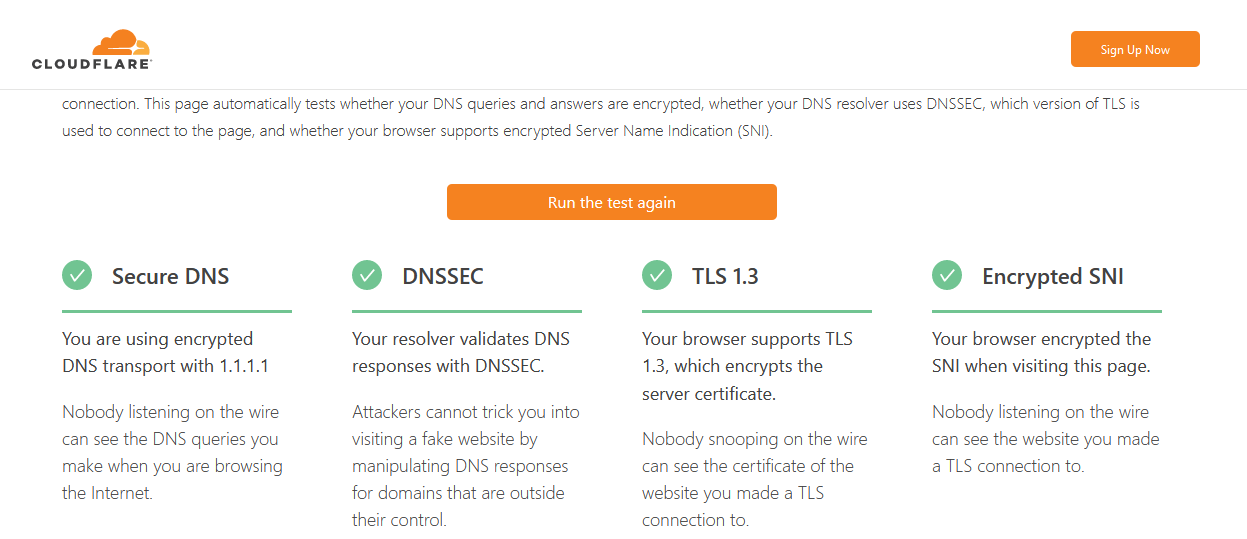
To check if everything is working properly, if you have activated and functional both DNSSEC and Encrypted SNI, just check online at the following link:
https://www.cloudflare.com/ssl/encrypted-sni/
The result must be as in the following image. If an (X) appears, it means that something was not done well …
That was all, simple, wasn’t it? 🙂
Now your navigation will become more secretive and hidden from prying eyes …
P.S. it remains to wait for technology to evolve and make sure that DNSSEC servers will not spy on us in turn, which would not be excluded at all … after all, nothing is free in this world, especially what is good! 🙂


2 Comments
Get HTTP Status Code from Header – PHP – ipFail
[…] the SSL verification because there are cases in which the site is redirected from a domain where the SSL has […]
How to get rid of the X Premium button if it becomes annoying – ipFail
[…] Install uBlock Origin Extension in your browser […]